Call/Text (973) 442 1111
Official Pet Stop® Owner’s Guide
Guide Table of Contents
Owner’s Guide > Outdoor Transmitters
Outdoor Transmitters
Your transmitter comes complete with these standard features:
Built-in Lightning Protection with Zapp Alert® Warning
Traditionally, lightning is one of the most common causes of transmitter failure. Pet Stop has developed built-in surge and over-voltage protection for both the electrical outlet and any high voltage carried by the buried wire in your yard. To add extra protection for you and your pet, we have added Zapp Alert®, an audio-visual indication feature should lightning damage your unit. If your transmitter experiences an electrical surge, the transmitter will continue to sound two short beeps. If this happens, contact your local Pet Stop dealer for service immediately.
Remeber
Do not allow your pet outside during a lightning storm.
Wire Break Warning System
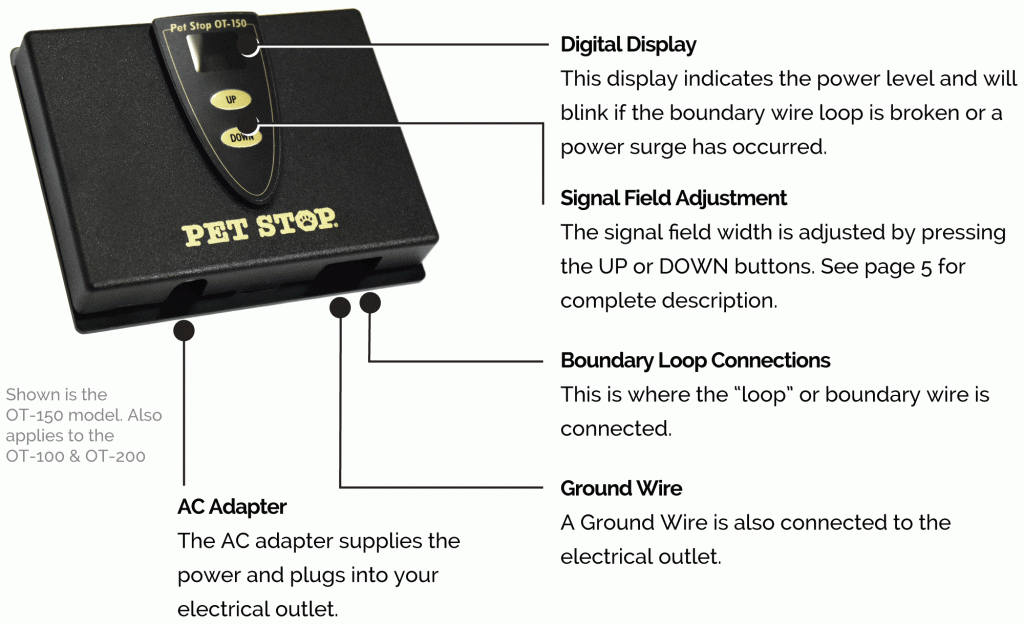
Your transmitter also has a built-in sensor which monitors the boundary wire. If, for any reason, the wire becomes broken, the transmitter display will flash and a continuous single beep will alert you to the problem. Unplug the transmitter and contact your local Pet Stop dealer to assist you in locating and repairing the wire break correctly.
Fully Adjustable Signal Field
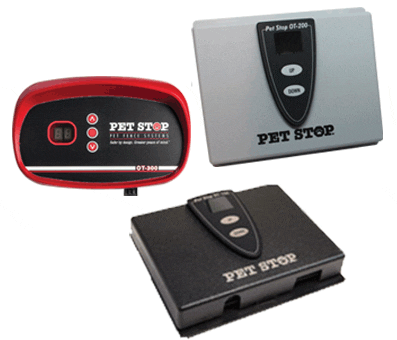
Your transmitter is also completely adjustable. Press the up and down buttons located on the front of the transmitter to adjust the signal field for your specific installation. Please see ‘ADJUSTING SIGNAL FIELD’ on page 7. The range displayed has a range from 01 to 32. For example, if your range is set to 16 this indicates there is 8 feet of signal field on either side of the boundary wire for a total of 16 feet.
Title
Your Pet Stop dealer has set the signal field range appropriate for your installation. Before adjusting the signal field width contact your dealer.
Title
We recommend that your dog be on a leash or carefully supervised if the transmitter is not functioning.
OT-100, OT-150, & OT-200
Features
Transmitter Programming
Your Pet Stop dealer has programmed your system specifically for your pets. Should you need to modify the programming please consult your local Pet Stop dealer
Title
To turn the transmitter off, simply unplug the transmitter from the power jack.
OT-300
Features
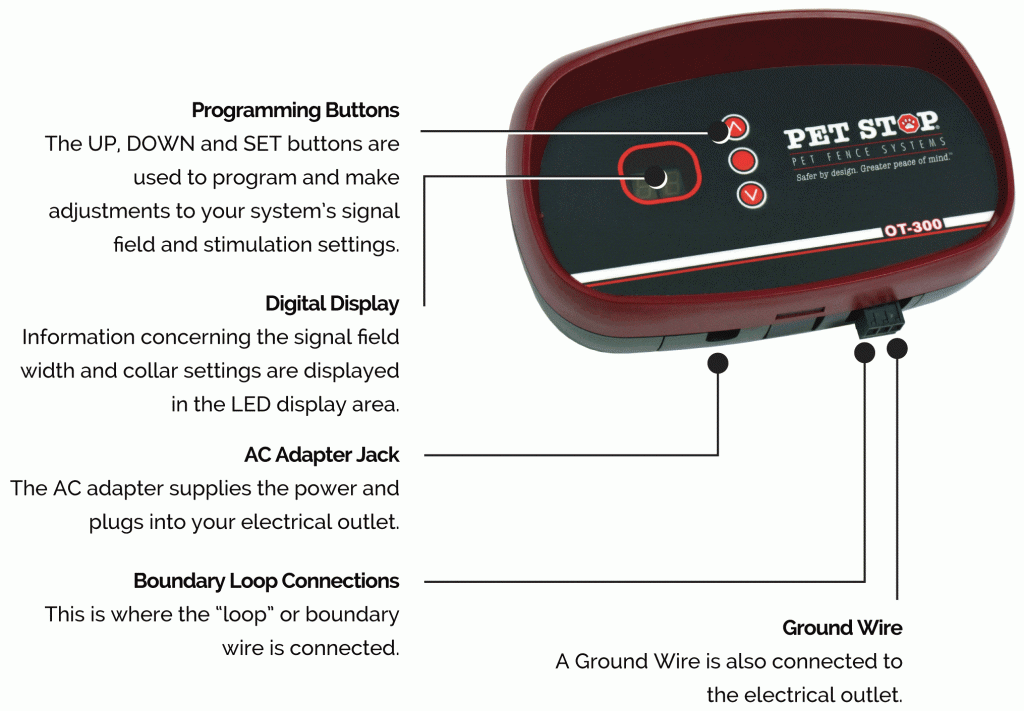
OT-300 Transmitter Programming
Your Pet Stop dealer has programmed your system specifically for your pets. Should you need to modify the programming please consult your local Pet Stop dealer.
Adjusting the signal field
Use the following steps to adjust the system’s signal field, or how far your pet can approach the buried wire.
- Hold the SET BUTTON (Center) until the display turns off. Immediately RELEASE the SET button. The current signal field setting will be displayed in the LED and two small red dots will be visible at the bottom of the display indicating program mode.
- Use the UP and DOWN arrow keys to adjust your boundary setting to your preferred boundary setting. The range displayed has a range from 01 to 32.For example, if your range is set to 16 this indicates there is 8 feet of signal field on either side of the boundary wire for a total of 16 feet.
- Press SET BUTTON when finished. The number will flash once to indicate a change has been made and return to normal operation. If SET is not pushed, the programming mode will timeout after 40 seconds and return to the previous setting.


